
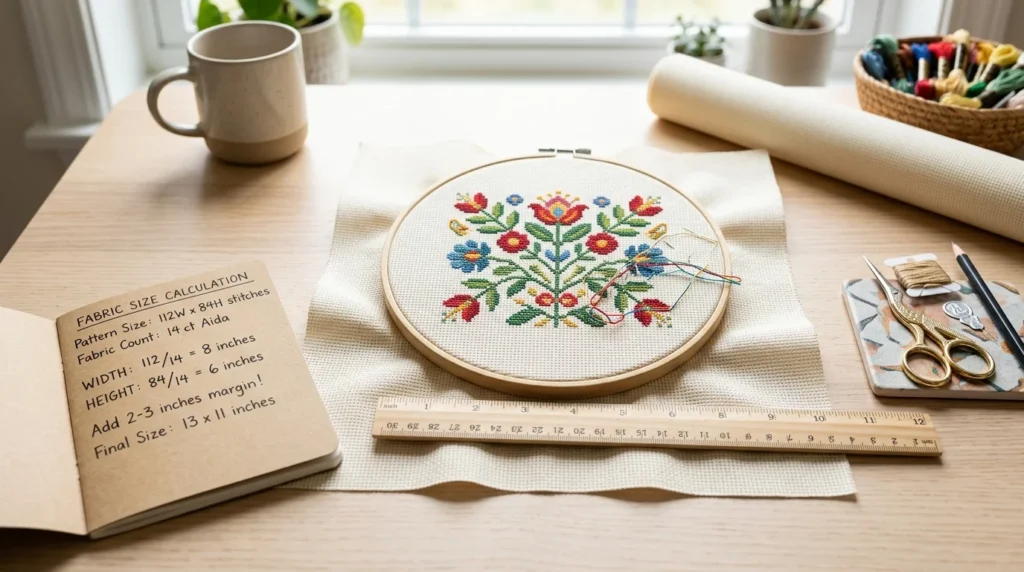
Choosing the right fabric size is one of the first things to get right when starting a cross stitch project. A pattern may tell you that it is 100 × 140 stitches, but that does not tell you how large the finished design will be on your chosen fabric. The good news is that the calculation is simple once you understand fabric count. You can also use a Cross Stitch Calculator to quickly check the finished dimensions before cutting your fabric.
What Is Cross Stitch Stitch Count?
The stitch count is the number of stitches in a design, measured across its width and down its height. A pattern might have a stitch count of 100 × 140, meaning it contains 100 stitches from side to side and 140 stitches from top to bottom.
It is important to remember that stitch count is not the same as the finished size in inches or centimeters. The physical size depends on the fabric count you use. The same 100 × 140 stitch pattern can produce different finished dimensions on 11-count, 14-count, 16-count, or 18-count fabric.
For example, a design with 140 stitches across will be larger on 14-count fabric than on 18-count fabric. This is because higher-count fabric has more threads or squares per inch, so each individual stitch occupies less physical space. As a result, the same number of stitches produces a smaller finished design on higher-count fabric.
What Does Fabric Count Mean?
Fabric count tells you how many stitches can fit into one inch of fabric. For example, 14-count Aida has approximately 14 stitch spaces per inch, while 18-count Aida has approximately 18 stitch spaces per inch.
The relationship is straightforward: a lower count creates larger stitches and a larger finished design, while a higher count creates smaller stitches and a smaller finished design when the stitch count stays the same.
Some common Aida counts are 11, 14, 16, and 18. Fourteen-count Aida is a popular choice for many projects because the stitch spaces are relatively easy to see and the finished design is not excessively large.
The Basic Cross Stitch Fabric Size Formula
The basic formula for finding the finished stitched area is:
Finished Size = Stitch Count ÷ Fabric Count
You need to perform the calculation separately for the width and height.
For example, suppose your pattern is 140 stitches wide and 100 stitches high, and you are using 14-count Aida.
Width: 140 ÷ 14 = 10 inches
Height: 100 ÷ 14 = 7.14 inches
So, the stitched portion of the design will measure approximately 10 × 7.14 inches.
This formula works because fabric count represents the number of stitches that fit into one inch. Dividing the number of stitches by the number of stitches per inch gives you the number of inches required for the design.
How to Calculate Cross Stitch Fabric Size Step by Step
Calculating your fabric size only takes a few steps.
Step 1: Find the Pattern’s Stitch Count
Start by checking your cross stitch pattern for its stitch count. It is commonly written in a format such as 100 × 150 stitches or 140W × 200H.
The first number represents the width, while the second represents the height. Make sure you are using the actual design dimensions rather than the recommended fabric dimensions.
Step 2: Check Your Fabric Count
Next, determine the count of your fabric. You may see labels such as 11-count, 14-count, 16-count, or 18-count Aida.
If you are working with evenweave or linen, pay attention to how the pattern is stitched. For example, a 28-count fabric stitched over two threads has an effective stitch count of 14 stitches per inch, so it can produce the same stitched dimensions as 14-count Aida when the stitching method is equivalent.
Step 3: Divide the Stitch Count by the Fabric Count
Divide the pattern’s width by the fabric count to find the finished width. Then divide the pattern’s height by the same count to find the finished height.
For example:
Pattern: 120 × 180 stitches
Fabric: 14-count Aida
Width: 120 ÷ 14 = 8.57 inches
Height: 180 ÷ 14 = 12.86 inches
The stitched design will therefore be approximately 8.57 × 12.86 inches.
Cross Stitch Fabric Size Examples
Looking at a few examples makes the calculation easier to understand.
Imagine you have a 100 × 100 stitch design. On 14-count fabric, the calculation is 100 ÷ 14, giving approximately 7.14 inches in both directions.
On 16-count fabric, 100 ÷ 16 gives approximately 6.25 inches.
On 18-count fabric, 100 ÷ 18 gives approximately 5.56 inches.
The number of stitches has not changed. Only the fabric count has changed, which changes the physical size of the finished design.
| Stitch Count | 14-Count Fabric | 16-Count Fabric | 18-Count Fabric |
|---|---|---|---|
| 50 × 50 | 3.57 × 3.57 in | 3.13 × 3.13 in | 2.78 × 2.78 in |
| 100 × 100 | 7.14 × 7.14 in | 6.25 × 6.25 in | 5.56 × 5.56 in |
| 140 × 180 | 10 × 12.86 in | 8.75 × 11.25 in | 7.78 × 10 in |
| These figures represent the stitched area only. They do not include the additional fabric needed around the design for handling, hooping, mounting, or framing. |
How Much Extra Fabric Should You Add?
One of the most common mistakes is cutting fabric to exactly the size of the stitched design. You need additional fabric around the edges so you have enough material to hold, frame, or finish the project.
The amount of extra fabric depends on how you plan to finish the piece. A commonly used approach is to leave a few inches of extra fabric on each side. Some stitchers prefer more when they are planning professional framing or a larger finishing method.
For example, if your finished stitched area is 8 × 10 inches and you want a 3-inch border on every side, your fabric should be:
Width: 8 + 3 + 3 = 14 inches
Height: 10 + 3 + 3 = 16 inches
So you would cut approximately 14 × 16 inches of fabric, allowing for the desired border.
It is generally better to have slightly more fabric than you think you need rather than cutting too close to the finished design.
How Fabric Count Changes the Finished Size
Changing fabric count can dramatically change the final dimensions of a project. This is particularly useful when you want a design to fit a particular frame or hoop.
Suppose a pattern is 140 stitches wide. On 14-count fabric, it will be 10 inches wide. On 18-count fabric, it will be about 7.78 inches wide.
That means you can use a higher fabric count when you want the same pattern to produce a smaller finished piece. A lower count can be useful when you want larger stitches that are easier to see.
The choice is not only about size, though. Fabric count also affects the appearance and level of detail of the finished stitching. Higher counts generally create smaller stitches and can allow a design to appear more compact and detailed.
How to Convert Cross Stitch Size to Centimeters
If you normally work in centimeters, converting your result is easy.
Once you calculate the finished size in inches, multiply it by 2.54 to convert it to centimeters.
For example, if your finished width is 10 inches:
10 × 2.54 = 25.4 cm
Therefore, a 10-inch-wide design is approximately 25.4 centimeters wide.
You can perform this conversion for both the width and height. Doing the calculation separately helps prevent mistakes when your pattern is rectangular rather than square.
What About 28-Count Linen or Evenweave?
Linen and evenweave fabrics can require an extra step because cross stitch may be worked over multiple fabric threads.
For example, when stitching over two threads on 28-count fabric, the effective count is 14 stitches per inch. That means a 140-stitch-wide design would have a stitched width of approximately 10 inches, just like the same stitch count on 14-count Aida.
Always check the instructions for your specific pattern because the stitching method can affect the calculation.
Common Mistakes When Calculating Fabric Size
A few simple mistakes can lead to problems later in a project.
Using the wrong stitch count: Make sure you use the design’s actual width and height in stitches.
Forgetting the fabric count: The stitch count alone cannot tell you the finished physical size.
Adding too little border: Do not cut fabric exactly to the stitched dimensions.
Mixing inches and centimeters: Complete the calculation in one unit before converting to another.
Ignoring stitching method: Linen and evenweave may require you to account for whether you are stitching over one or two threads.
Taking a minute to check these details before cutting can save fabric, time, and frustration.
Can You Calculate Cross Stitch Fabric Size Without Doing the Math?
Yes. If you already know the pattern’s stitch count and fabric count, an online calculator can do the division for you. This is particularly helpful when comparing several fabric counts or working with a large pattern.
For example, you can enter the width and height of your design, select the fabric count, and use the result to determine the approximate finished size. You can then add your preferred border to work out how much fabric to cut.
A calculator is especially useful when you want to compare options quickly. Instead of manually calculating the same pattern on 14-count, 16-count, and 18-count fabric, you can check each option and choose the size that works for your project.
Final Thoughts
Calculating cross stitch fabric size is much easier than it may seem. Once you know the pattern’s stitch count and your fabric count, simply divide the number of stitches by the number of stitches per inch. Calculate the width and height separately, then add enough extra fabric around the design for your chosen finishing method.
The key formula to remember is stitch count ÷ fabric count = finished stitched size in inches. After that, multiply by 2.54 if you need the measurement in centimeters.
Getting the calculation right before you cut your fabric can make the rest of your project much easier. Whether you are working on a small beginner pattern or a large counted cross stitch design, understanding stitch count and fabric count gives you a reliable way to predict the finished size and choose the right piece of fabric.